Server usage
Login
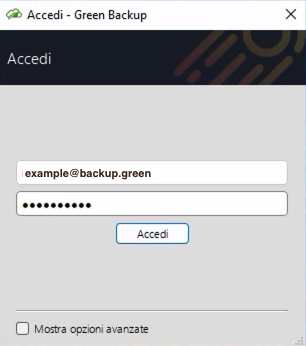
Insert the client's username and password, and click the button to log in.
Server address
The server address will be automatically filled, pointing to the CGreen Backupomet Server that generated the client software.
You can connect the Green Backup application to a different Server:
- Select the "Advanced Settings" option, to display the Server field.
- Enter the server address.
- The address should include the protocol https; any non-default port; and a trailing forward-slash (/) character at the end (e.g. cbs.backup.green/)
Client Device Registration
If this is the first time logging in to your Comet Backup account from this device, you will be prompted to register the device into your account.
Backup
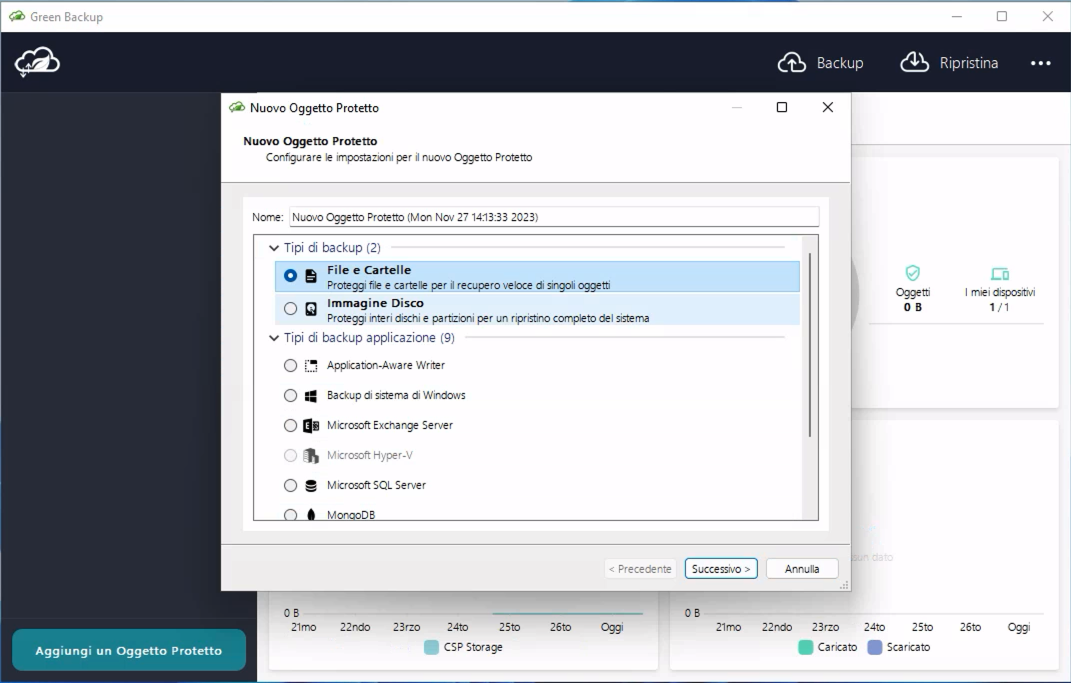
Add a new Protected Item
To add a new Protected Item, mouse over the "Protected Items" text and click the "Add" button at the bottom right.
If you don't have any 'Protected Items' yet, the window to add a new one will automatically open upon login.
For more information about configuring a Protected Item, see the "User configuration" section. No changes are applied until the Save button is pressed.
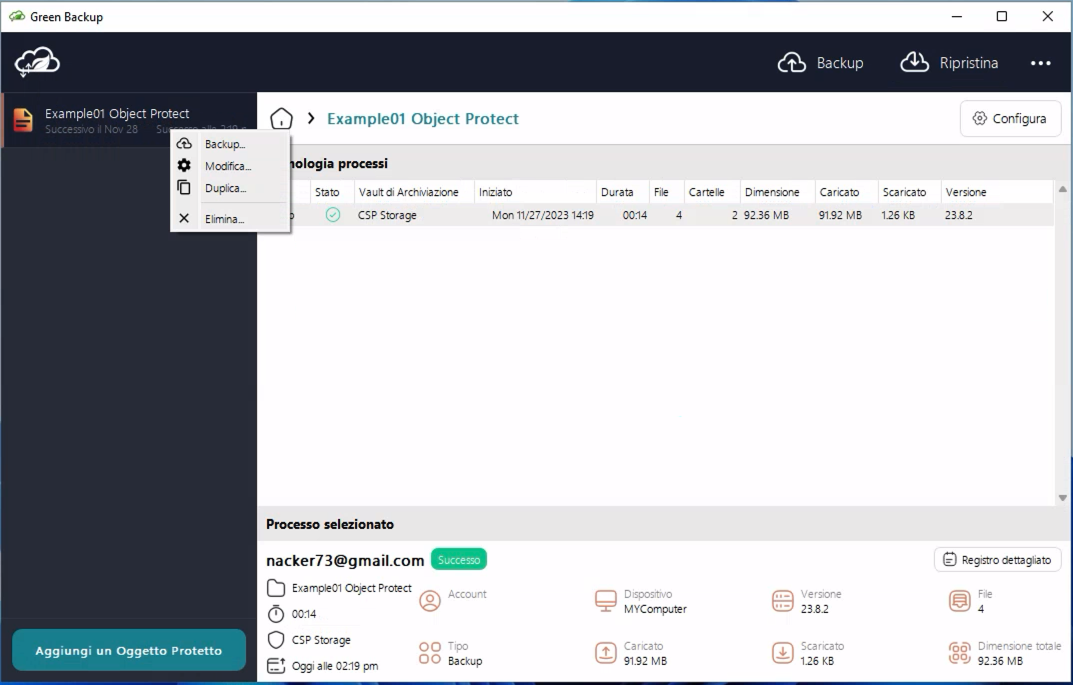
Edit an existing Protected Item
To edit an existing select it in the sidebar, then click the 'Configure' button at the top right, or right-click on the selected item and choose 'Edit'.
For more information about configuring a Protected Item, see the "User configuration" section. No changes are applied until the Save button is pressed.
Back up data
Data should be backed up automatically on schedule as per the schedule setting options above. The backup schedules will still run even if logged out of the client GUI, as the background service will stay logged in.
At times, you may wish to immediately start a backup job, or back up to a different Storage Vault than usual.
You can back up any Protected Item to any Storage Vault as follows::
- Click a Protected Item, and click the Backup Now button at the top right on the Top Bar, or right-click on the selected item and choose Backup.
- Follow the guided procedure to select a destination Storage Vault.
The backup job will be displayed in the main window interface.
Restore
Clicking the Restore tab at the top right on the Top Bar opens the Restore dialog. Multiple actions are possible from within the Restore dialog:
Restore data
You can restore data from any Storage Vault as follows:
- Select the protected item in the sidebar and click the Restore button at the top right.
- Choose the Storage Vault containing the backup data and click Next.
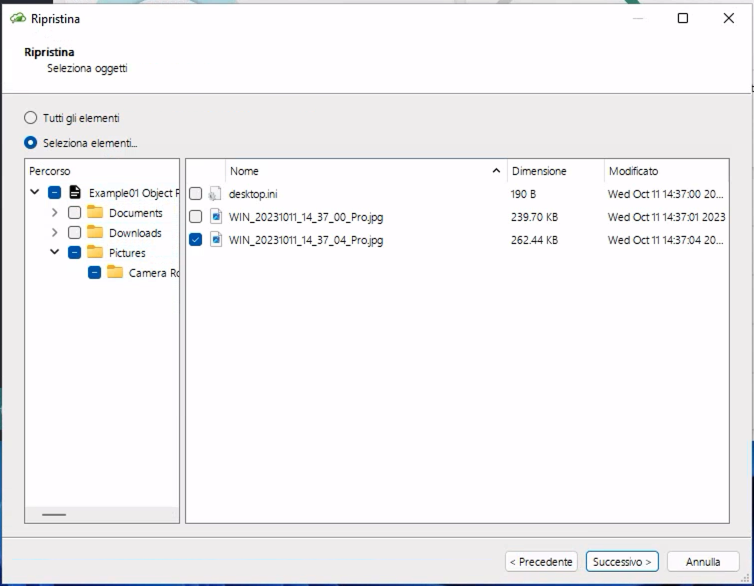
- Select the Protected Item that you want to restore, and click Next.
- (Optional) Unfold the Protected Item to pick a snapshot other than the most recent.
- (Optional) Use the Search button to search for files to restore.
- Select the files to restore, and click Next.
- (Optional) By default, all files are restored. You can use the "Choose files" radio option to select individual files or folders to restore.
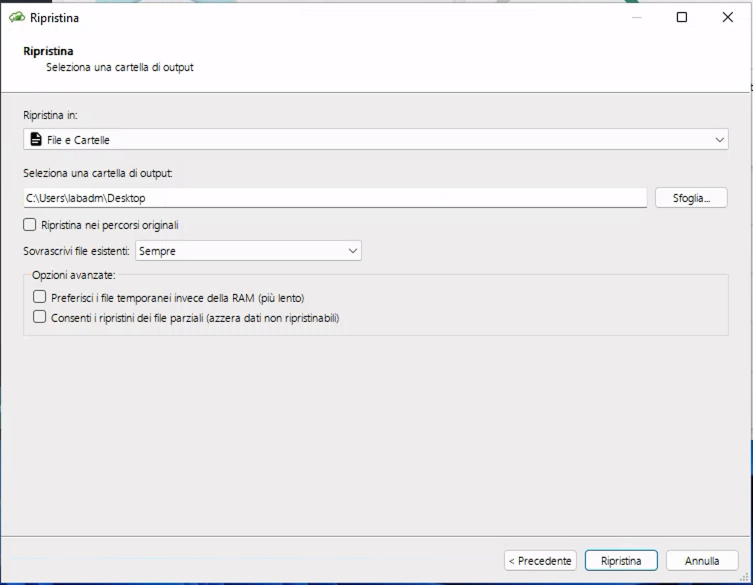
- Select the destination path to restore to, and click Next.
The restoration process begins, and you can track the progress in the main software window.
Restore types
During the file restoration, you can choose from the 'Restore to' dropdown list to restore the data as:
-
Files and Folders
-
The files you selected for restore will be restored from the Storage Vault to the local harddrive in the path you have selected..
-
The following options are available:
-
Restore to original paths
- If this option is checked, the selected files will be restored to their original on-disk locations.
- This option is currently not available for Protected Item types other than 'Files and Folders' and will be disabled in the interface when selecting different options.
-
Overwrite existing files
- Always. If this option is selected, every existing file will be silently overwritten with the restored file.
- Never. If this option is selected, every existing file will be silently ignored during the restore operation.
- Overwrite if the restored file is more recent. If this option is selected, more recent restored files will overwrite existing ones.
-
-
-
Simulate restore
- The files you selected for restore will be downloaded from the Storage Vault, and reassembled, but not saved onto the local harddrive. This option can be useful as a test of the restore process.
-
Program Input
- The files you selected for restore will be streamed as the standard input (stdin) to a command-line program.
- If you have selected multiple files for restore, you can choose whether they will result in multiple commands being run sequentially, or if the files are virtually archived before streaming into a single command-line program.
-
Compressed archive file (zip / tar).
- The files you selected for restore will be restored from the Storage Vault to an archive file on your local harddrive.
- If you select a compressed archive format, the files will consume less space on the local disk. No spool space is required when using a compressed archive format. This may be particularly useful for restoring large, highly compressible files (e.g. SQL dumps with repeated INSERT statements, or non-sparse disk images containing zero extents).
- The following file formats are available:
- zip (compressed)
- tar (uncompressed)
- The tar file format has many different specifications (V7 (1979), oldgnu (1992), GNU (1997), USTAR/POSIX (1998), PAX/POSIX (2001). Green Backup uses TAR POSIX 1003.1-2001 (pax) format files to preserve fidelity of file metadata. If your tar program does not fully support PAX extensions, you may see a hidden PaxHeader.0 directory.
- tar.gz (compressed)
- sqfs (compressed)
- SquashFS is a compressed archive file that can be mounted as a read-only virtual drive, using mount on Linux. This allows you to work with the compressed data while only requiring a low amount of physical disk space.
Remove a single backup snapshot
You can remove a single snapshot from within a Storage Vault as follows:
- Click the Restore button.
- Select the Storage Vault containing the backed-up data, and click Next.
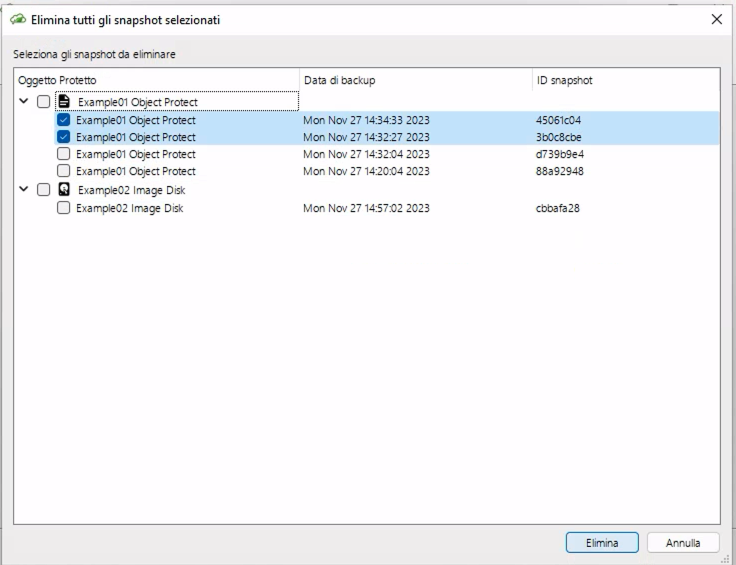
- Click on the delete button in the top-right corner of the window.
- In the new dialog window, select the snapshots to delete and click on 'Delete' at the bottom right.
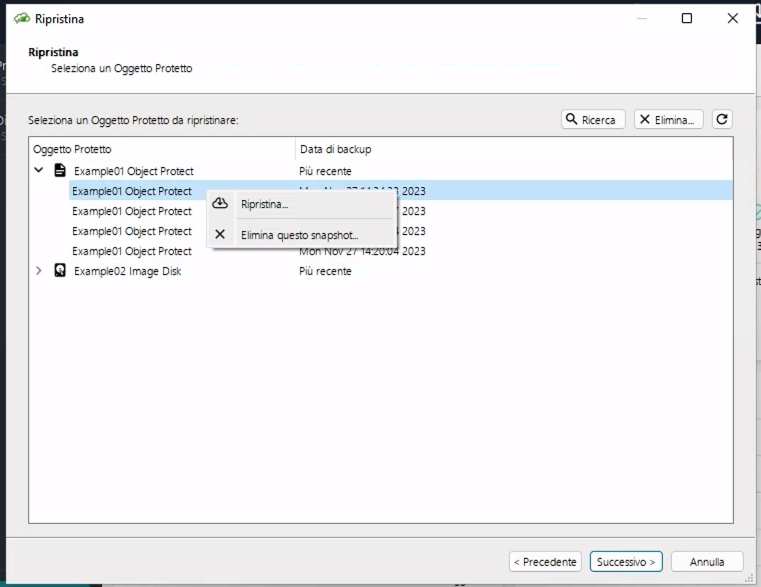
- Alternatively, after step 2, you can skip points 3 and 4, directly identify the snapshot of the Protected Item you want to remove from the Storage Vault by expanding the selection if necessary.
- Right-click on the Protected Item and select "Delete this snapshot".
Activities
It's possible to view the details of a specific backup process by selecting the protected item in the sidebar, the Backup Job in the main window, and clicking the Detail log button in the sub-window at the bottom. This will open the Report window with all the process details.
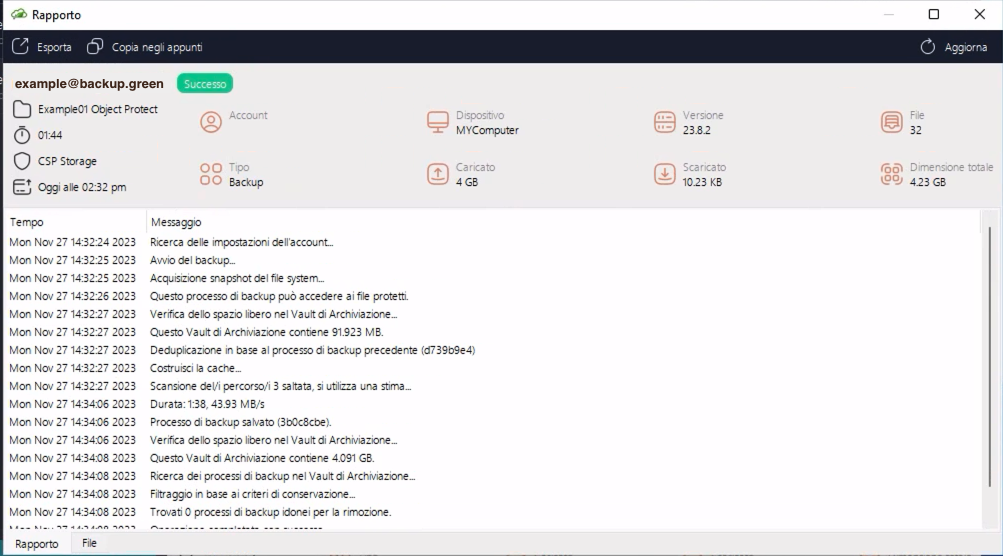
In the same way, you can access the list of all activities by selecting the item from the meetballs menu (top-right button). From there, you can then access the detailed report for each activity.
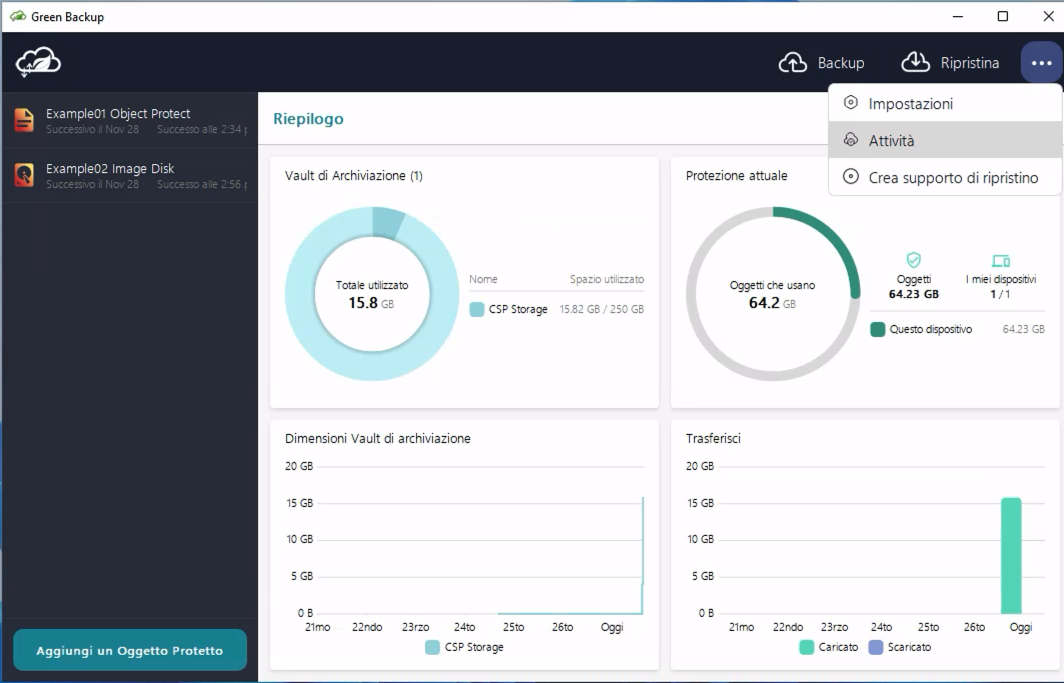
Settings
Expand the meetballs menu and select 'Settings'; the 'Settings' window will open, with 5 TABs:
-
Storage Vault. Displays the name of the Storage Vault along with its size and used space.
-
Preferences. Allows you to select the language and grant/revoke permissions for system administrators to reset the user password (be cautious, as revoking this permission means that if the user password is lost, it will no longer be possible to recover the backups since encryption is based on the user password). Additionally, you can select the 'Unlock at startup' option so that the password is not required the first time the user interface is opened.
-
Account. Allows customization of the displayed Account Name (No login)
-
Reporting. Reserved for future use.
-
Devices. Displays the list of devices connected to the account.
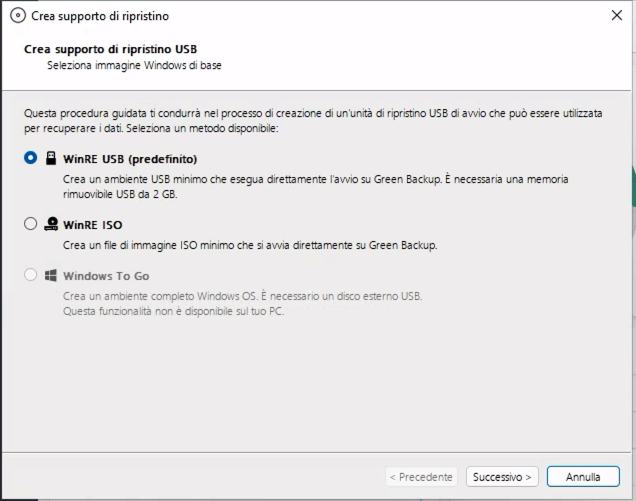
Create Recovery Media
Expand the meetballs menu and select "Create Recovery Media". Follow the procedure according to your preference based on the displayed options.